Create account amazon seller central
This topic is very important if you want to start an online selling
business. In this blog, I will discuss all the steps for creating a
seller account on amazon. This is totally free. You do not need to pay
anything for creating a seller account on amazon. If someone ask you to
pay something for creating a seller account then you should not pay
anything for that. Amazon does not charge anything to create a seller
account.

After getting all the things you can start the process of registration. For registration you will need an active mobile number and an active email address.
The steps for creating the seller account on amazon are discussed below -
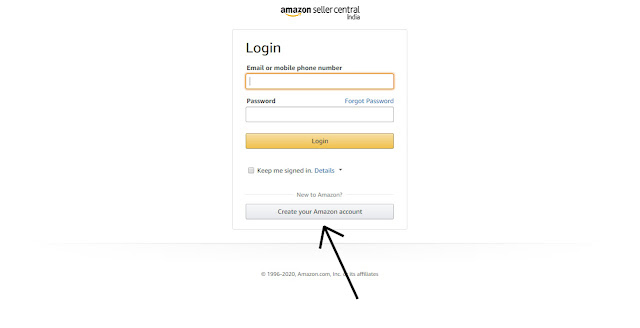
Step 1 - You need to open the amazon seller central page. You can open it directly from https://sellercentral.amazon.in. The page will look like the image given below -
Step 2 - You need to click on "Register Now" button to start the process of registration.
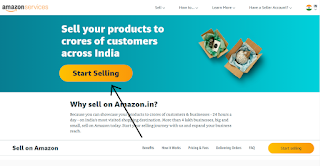
Step 3 - After clicking on register now button, a new page will open up like the image given below. you need to click on "Start Selling" button.
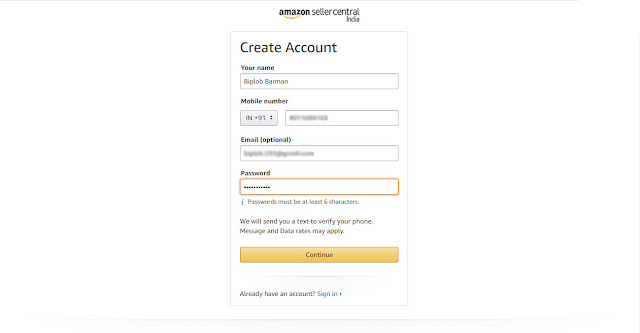
Step 5 - Now, you need to fill the form that is showing below in the image. You need to fill up your full name, your mobile number, email address and a password (password should have at least 6 characters). Then you need to click on "Continue" button.
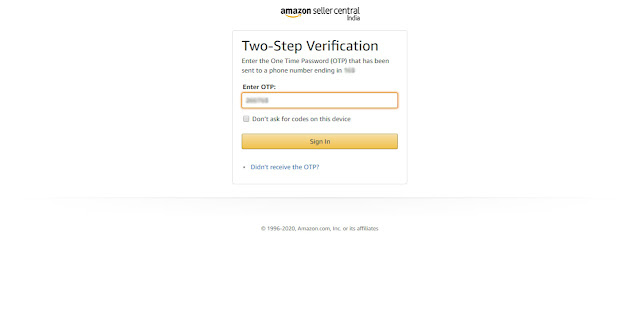
Step 6 - You will receive an OTP in your mobile number. You need to enter that otp in the desired space as shown in the image given below. After that, you need to click on sign in button.
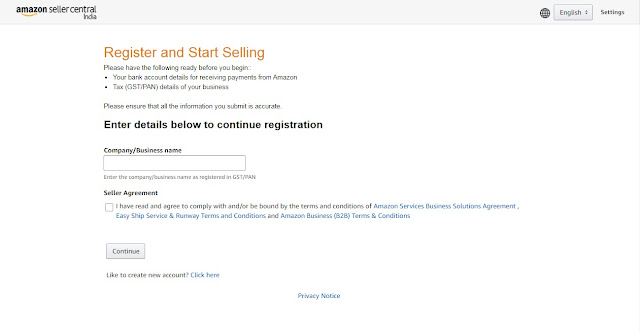
Step 7 - Now, the page of Amazon Seller Central will open as shown in the image below. Here, you need to enter the name of your shop/trade/business and check the box beside "I have read and agree...". Then you need to click on "continue" button.
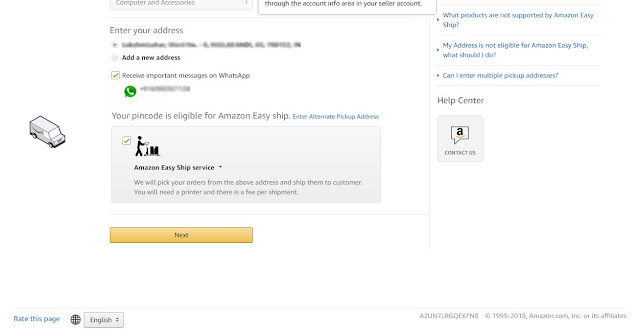
Step 8 - Now, a new page will open. In this step, enter your shop/business/trade name again. Enter your business address and click on continue button to go to the next step.
Step 9 - Here you will be prompted to verify whether you want important messages of amazon through whatsapp or not. If you want to receive messages through whatsapp then check the desired box. If your pin code is eligible for amazon easy ship service then it will ask you to check the box if you want this service (I will recommend you to check this box to accept the amazon easy ship service). Then click on continue button.
Step 10 - In this step, you need to click on "Enable Two-Step Verification" button.
Step 11 - Then you will be asked to enter your password and log in to your amazon account. Here you need to enter you amazon password and click on "Login" button.
Step 12 - Here, you need to enter your mobile phone number again. Click on the radio button beside text message and click on "Continue" button.
Step 13 - You will receive an OTP code on your mobile number through text message. In the new page, enter the OTP in the desired space and click on "Continue" button.
Step 14 - Now, click on the check box beside "I don't want OTP on this browser" and click on the button below.
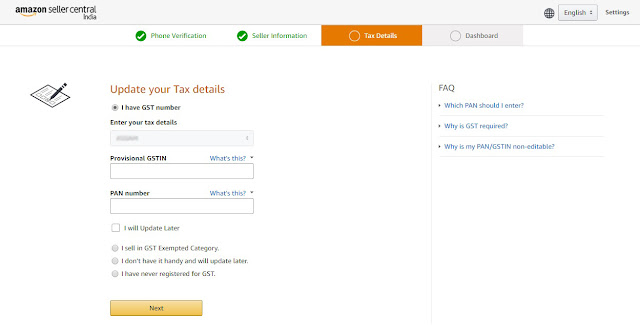
Step 15 - In this step, you need to enter your GSTIN number and PAN number in the desired spaces and click on "Next" button.
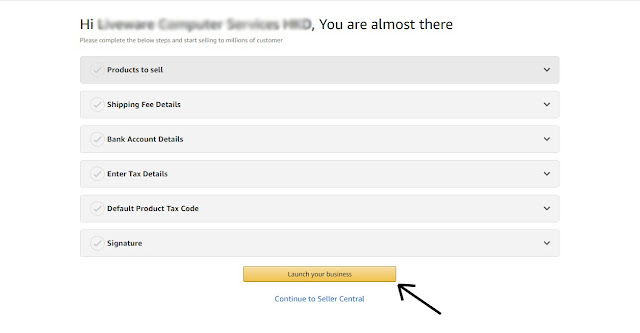
Step 16 - In this step, you need to enter your bank details including Account holder name, Account Name, Account Number, IFSC code and save it. After that, you need to upload your signature in the upload signature area. You need to scan your signature and upload that and click on save. You need to set the shipping fee the "Shipping Fee Details" and save that. Under "Default Product Tax Code" section, you need to select a tax code as a default tax code and save that section. Lastly, you need to list at least one product to start selling. Finally. click on "Launch Your Business" to start selling on Amazon.
